
WHAT IS LIGHT ROOM?
Light room is a good way to manage them; like Photoshop, it is used for editing photos. Light room works by importing as many photos as you want and one by one you can go through them and edit them.
WHAT IS A RAW FILE?
A camera raw image file contains minimally processed data from the image sensor of either a digital camera, image scanner, or motion picture film scanner. Raw files are named so because they are not yet processed and therefore are not ready to be printed or edited with a bitmap graphics editor.
How to start:
First you have to create a new category. You have to go to file and it is the first one at the top of the selection. As you can see from the image below.

The second step is then to save it as a new file. It should come up with what to save it as; at this point you should name it ‘Light room’. The option to save as should look like this once you have got to this stage.
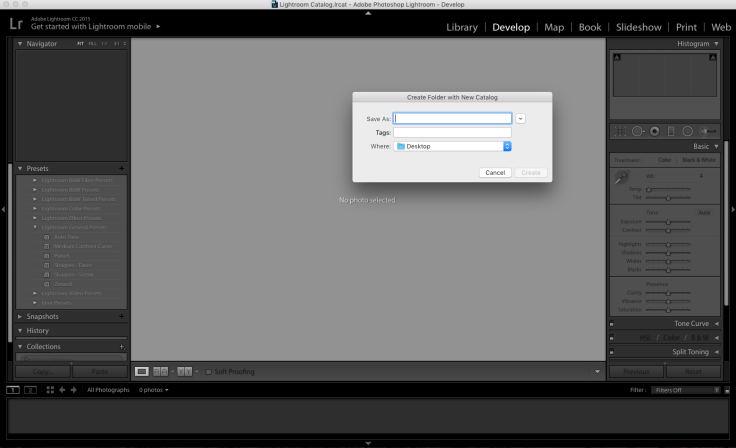
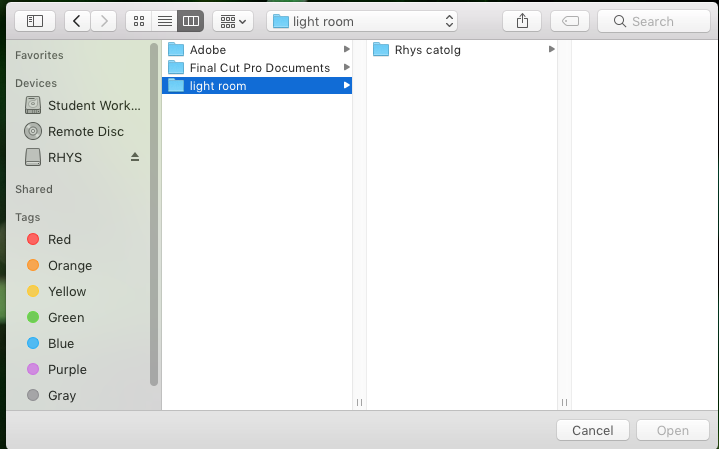
Once you have saved this file as ‘Light room’ you then have to create a new file and place it within the light room one. This file should be called ‘rhyscatolg’. This is just so you know where all of your edits/photographs are and it should be easy to find as it is one place and it is all together. Hopefully once its all done it will look like this or similar.
Once you have created the files to save them within, you can then start to import the photographs you would like to edit. To do this you must make sure you are on ‘library’ which is located at the top right hand side of the screen (As you can see by the image below). 
Then if you were to look at the left hand side and the bottom you would see import; this is how you import you photos (As shown on the image below). All that is left to do is to select where to get the images from and which ones you are going to use.

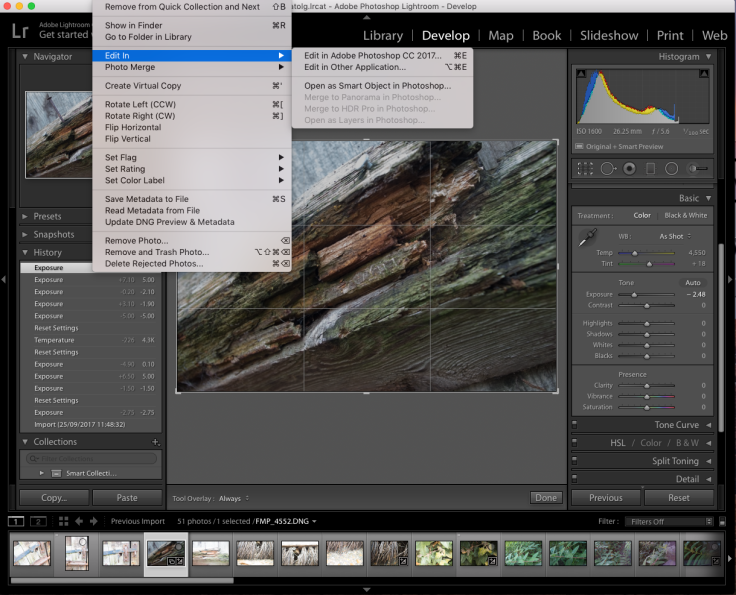
HOW TO GO TO PHOTOSHOP FROM LIGHT ROOM…
To go to photoshop from within light room; you must go to the tool bar at the top and then select ‘photo’. It should then show up with another drop selection. You select edit in and then the first option, which will then send you to photoshop. Once you have edited you image and you are happy with it, you then save it like normal and when yuo go back to light room it should be all ready.
You may want to do this is you want to edit your photo in a particular way, which light room can not do or maybe you just prefer to do so in photoshop.
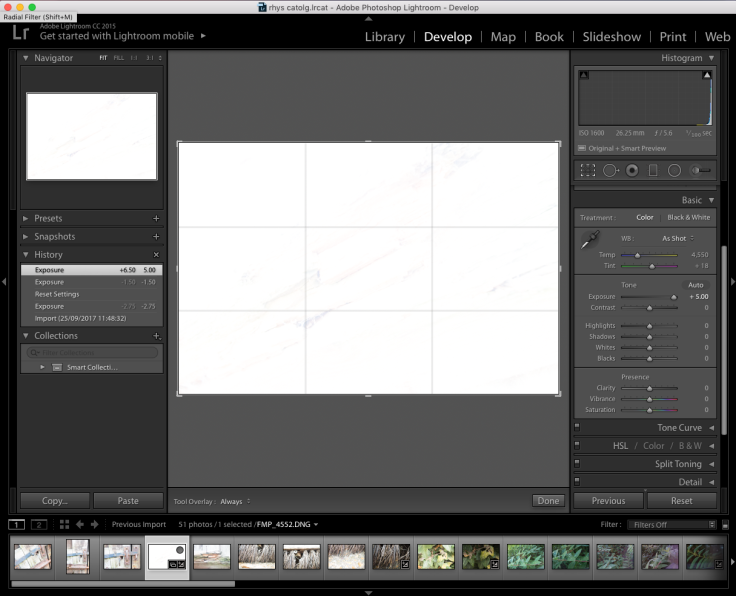
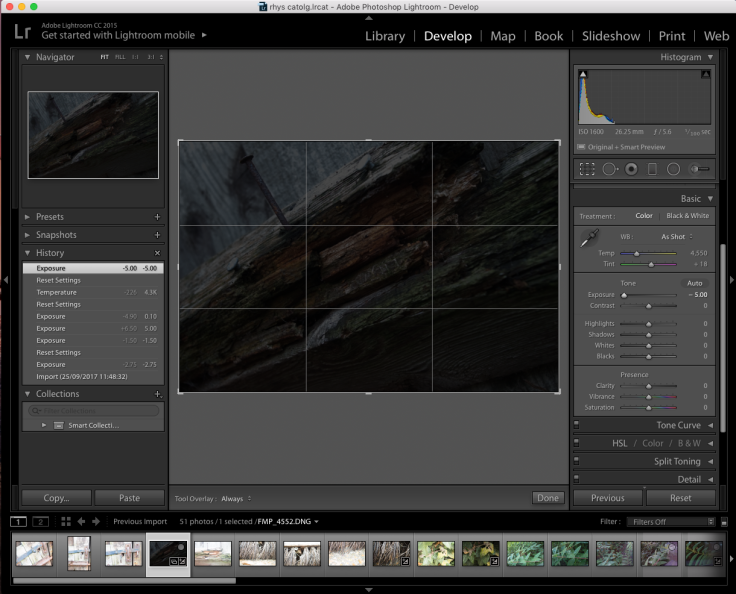
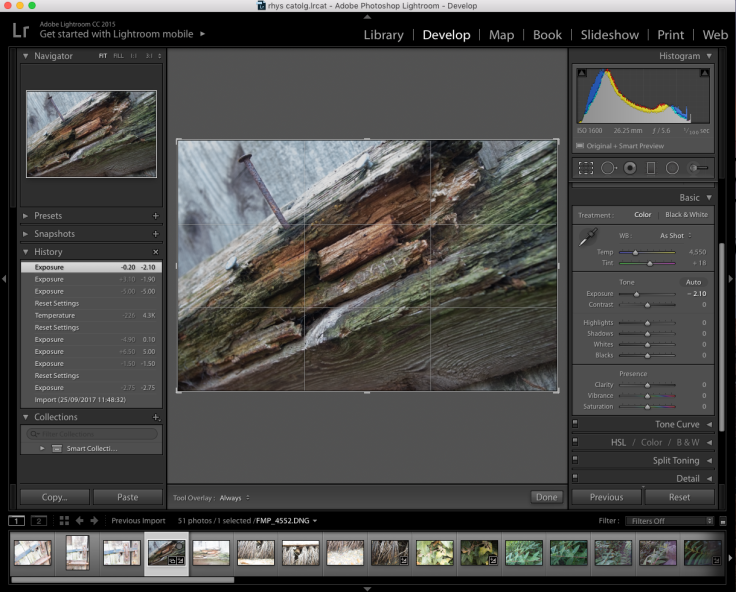
Histograms
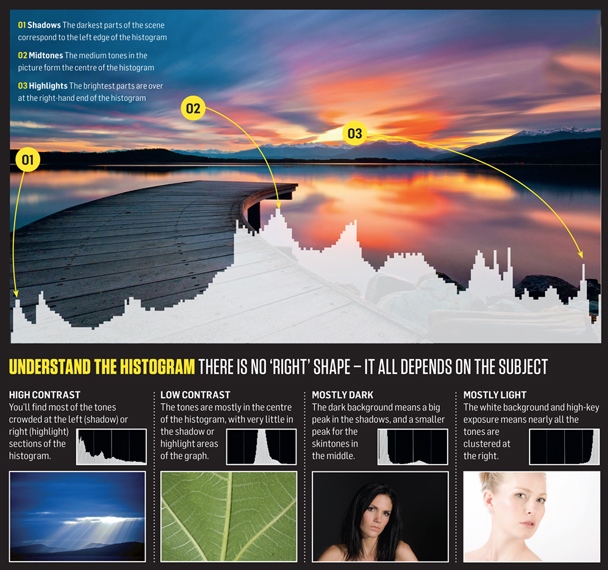
This is an example of a photograph being overly exposed. The histogram is all the way to the right and is very high, like the example.
This image shows what the exposure is like when it is set to the middle. The histogram starts off very high (but is not very thin like the over exposed image) and then goes very low. 
This example shows when an image is very under exposed as the histogram is very high but is all the way on the opposite side to the over exposed. As you can tell by the image below.
I would say that the example below is almost the perfect exposed image as it has not got too much like or dark and the image is very clear. It has a fairly low contrast and exposure.

Leave a comment