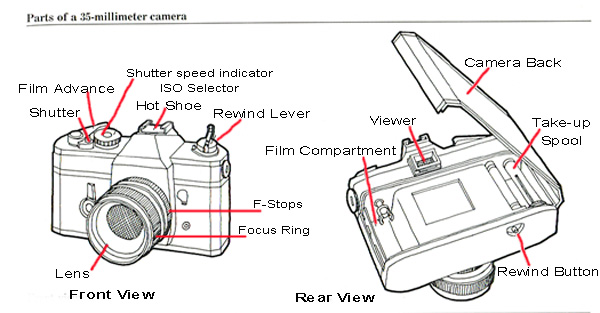
This was the same kind of camera I used to capture my shots.
To take a photograph you must have a film loaded in the back of the camera; in order to open the back of the camera, you have to pull the rewind lever up and then the back will open. You then have to place the film into the space designed for the film and feed the end of the film into the ‘teeth’ part (the take up stool) in the back of the camera. Once you have done this you reel it round using the rewind lever, this is found on the top of the camera, to ensure it is feeding through properly.
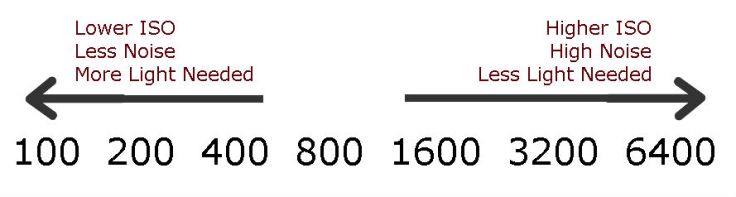
You take a photo by pressing the shutter release. The usual ISO of a film is 400, this is the sensitivity of the film due to exposure to light. You shut the back of the camera and do not open it until you have finished at the end, after you have finished and rewound the film. It is ideal to write down your aperture and shutter speed for each shot you have taken so that if it doesn’t turn out the way you want, you can look to where you went wrong. These are found near the top of the camera on the front lens.
You use the view-point to look at the object you want to take the picture of, making sure the focus point is at the middle, this means the aperture and shutter speed are right. Once you have taken each photo you have to pull back the lever, to be able to take the next photo. You can also see how many photos you have taken by looking at the top of the camera where there are some numbers which represent the number of photos taken.
Once you have taken all of the photos, you must rewind the film back into its container whilst holding the rewind button; once you have heard a clicking noise you are okay to take the film out without risking it being exposed and you are now ready to develop the film.

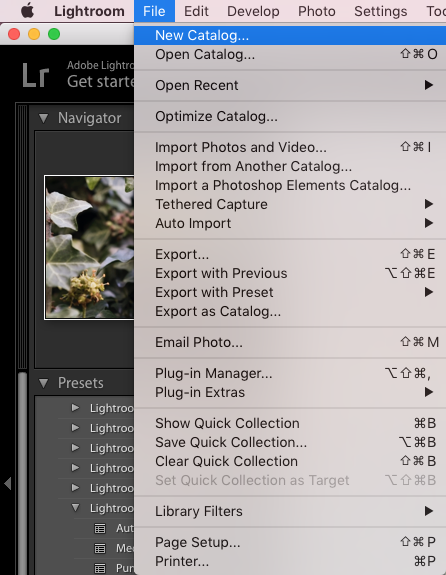
This shows how to take the ‘perfect’ photo and the reasons for them.
The film process:
LOAD- load your films onto the film reel and place into the light tight developing tank in on of the film closets.
DEVELOP- develop films for the time indicated by the type of film it is
- mix 150ml developer per film
- shake the canister a couple of times every 30 seconds
- discard developer by pouring into larger container left at the sink
STOP BATH
- pour 300ml stop bath undiluted straight from the container into your canister
- shake the canister continuously for 30 seconds
- pour stop bath straight back into the bottle it came from
FIXER
- Pour 300ml fixer undiluted straight from the container into your canister
- shake the canister a couple of times every 30 seconds for 5 minutes
- pour fixer back into the bottle it came from
- remove film reels from canister
WASH- wash for 20 minutes
PHOTO F1O/WETTING AGENT
- Place the film reels in the tank with photos F10 just covering them for 30 seconds
DRYING
- Squeeze the excess water off the film and place a clip on either end of the film
- Hang film for 5 minutes
Health and Safety
darkroom
- make sure that your space where you are working is clean and organised, so that you know where everything is, which will make everything easier to find and use when it comes to it.
- you need to make sure thta the wet and dry areas are kept seperate
- make sure once youve washed your prints you put them in a tray when youre carrying them to the dryer
- do not empty thre chemicals down the sink because it could cause problems later on for other people and could corrode the pipes and mkae sure they go inot the aste containers
- make sure yuore washing your hands after using the chemicals because they could be irratant to your skin
- do not eat or drink in the dark room as yu dont know what you have touched
- do not run around in the dark room as you could trip over something or you could fall into someone or something
- only approved people can use thedar room because there is limited space for working
- make sure you clean after youve finished your prints to make sure its tid and ready for the next person to use
Developing Health and Safety
- You have to make sure that you know where you have placed everything like your scissors, so that you dont end up cutting yourself or your partner.
- You have to make sure that you are care and take your time while developing your film because you are in complete dark and there for cant see what you are doing.
- While you’re in the dark room you have to make sure that you dont open the door until your film is in the light tight container so it doesnt expose your film to early
- You have to make sure that you have remembered where you have put everything because you wont be able to see where anything is as it is pitch black and if you drop something you may not be able to find it and could possibly fall over
- It is important not to panic while in the dark room because it is completely black you cant see what youre doing and may hurt yourself if youre not calm.
- make sure you dont take your phone out because it will expose the film too early
- make sure you dont fool around because youre in a small, tight area which is completely dark so you cant see what youre doing.
Objects for the dark room
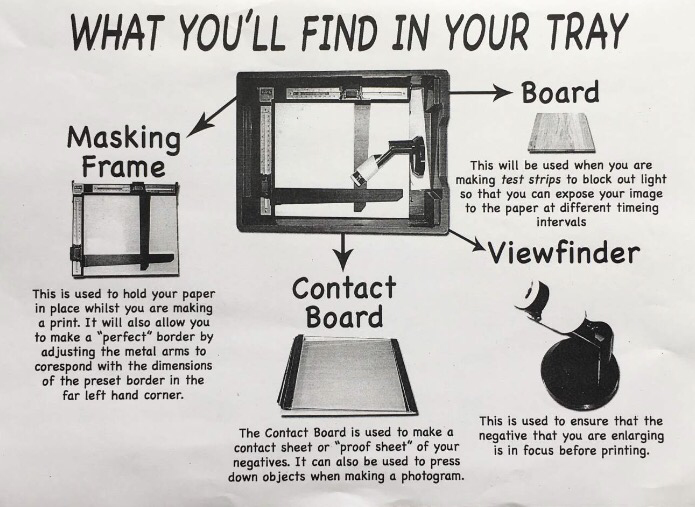
This was the equipment i used while i was in the dark room, to develop all of my film. I had to use all of these to get my images to to the point icould put them in the developer, fixer and rinse, before drying them.
Objects for the dark room

Test strips
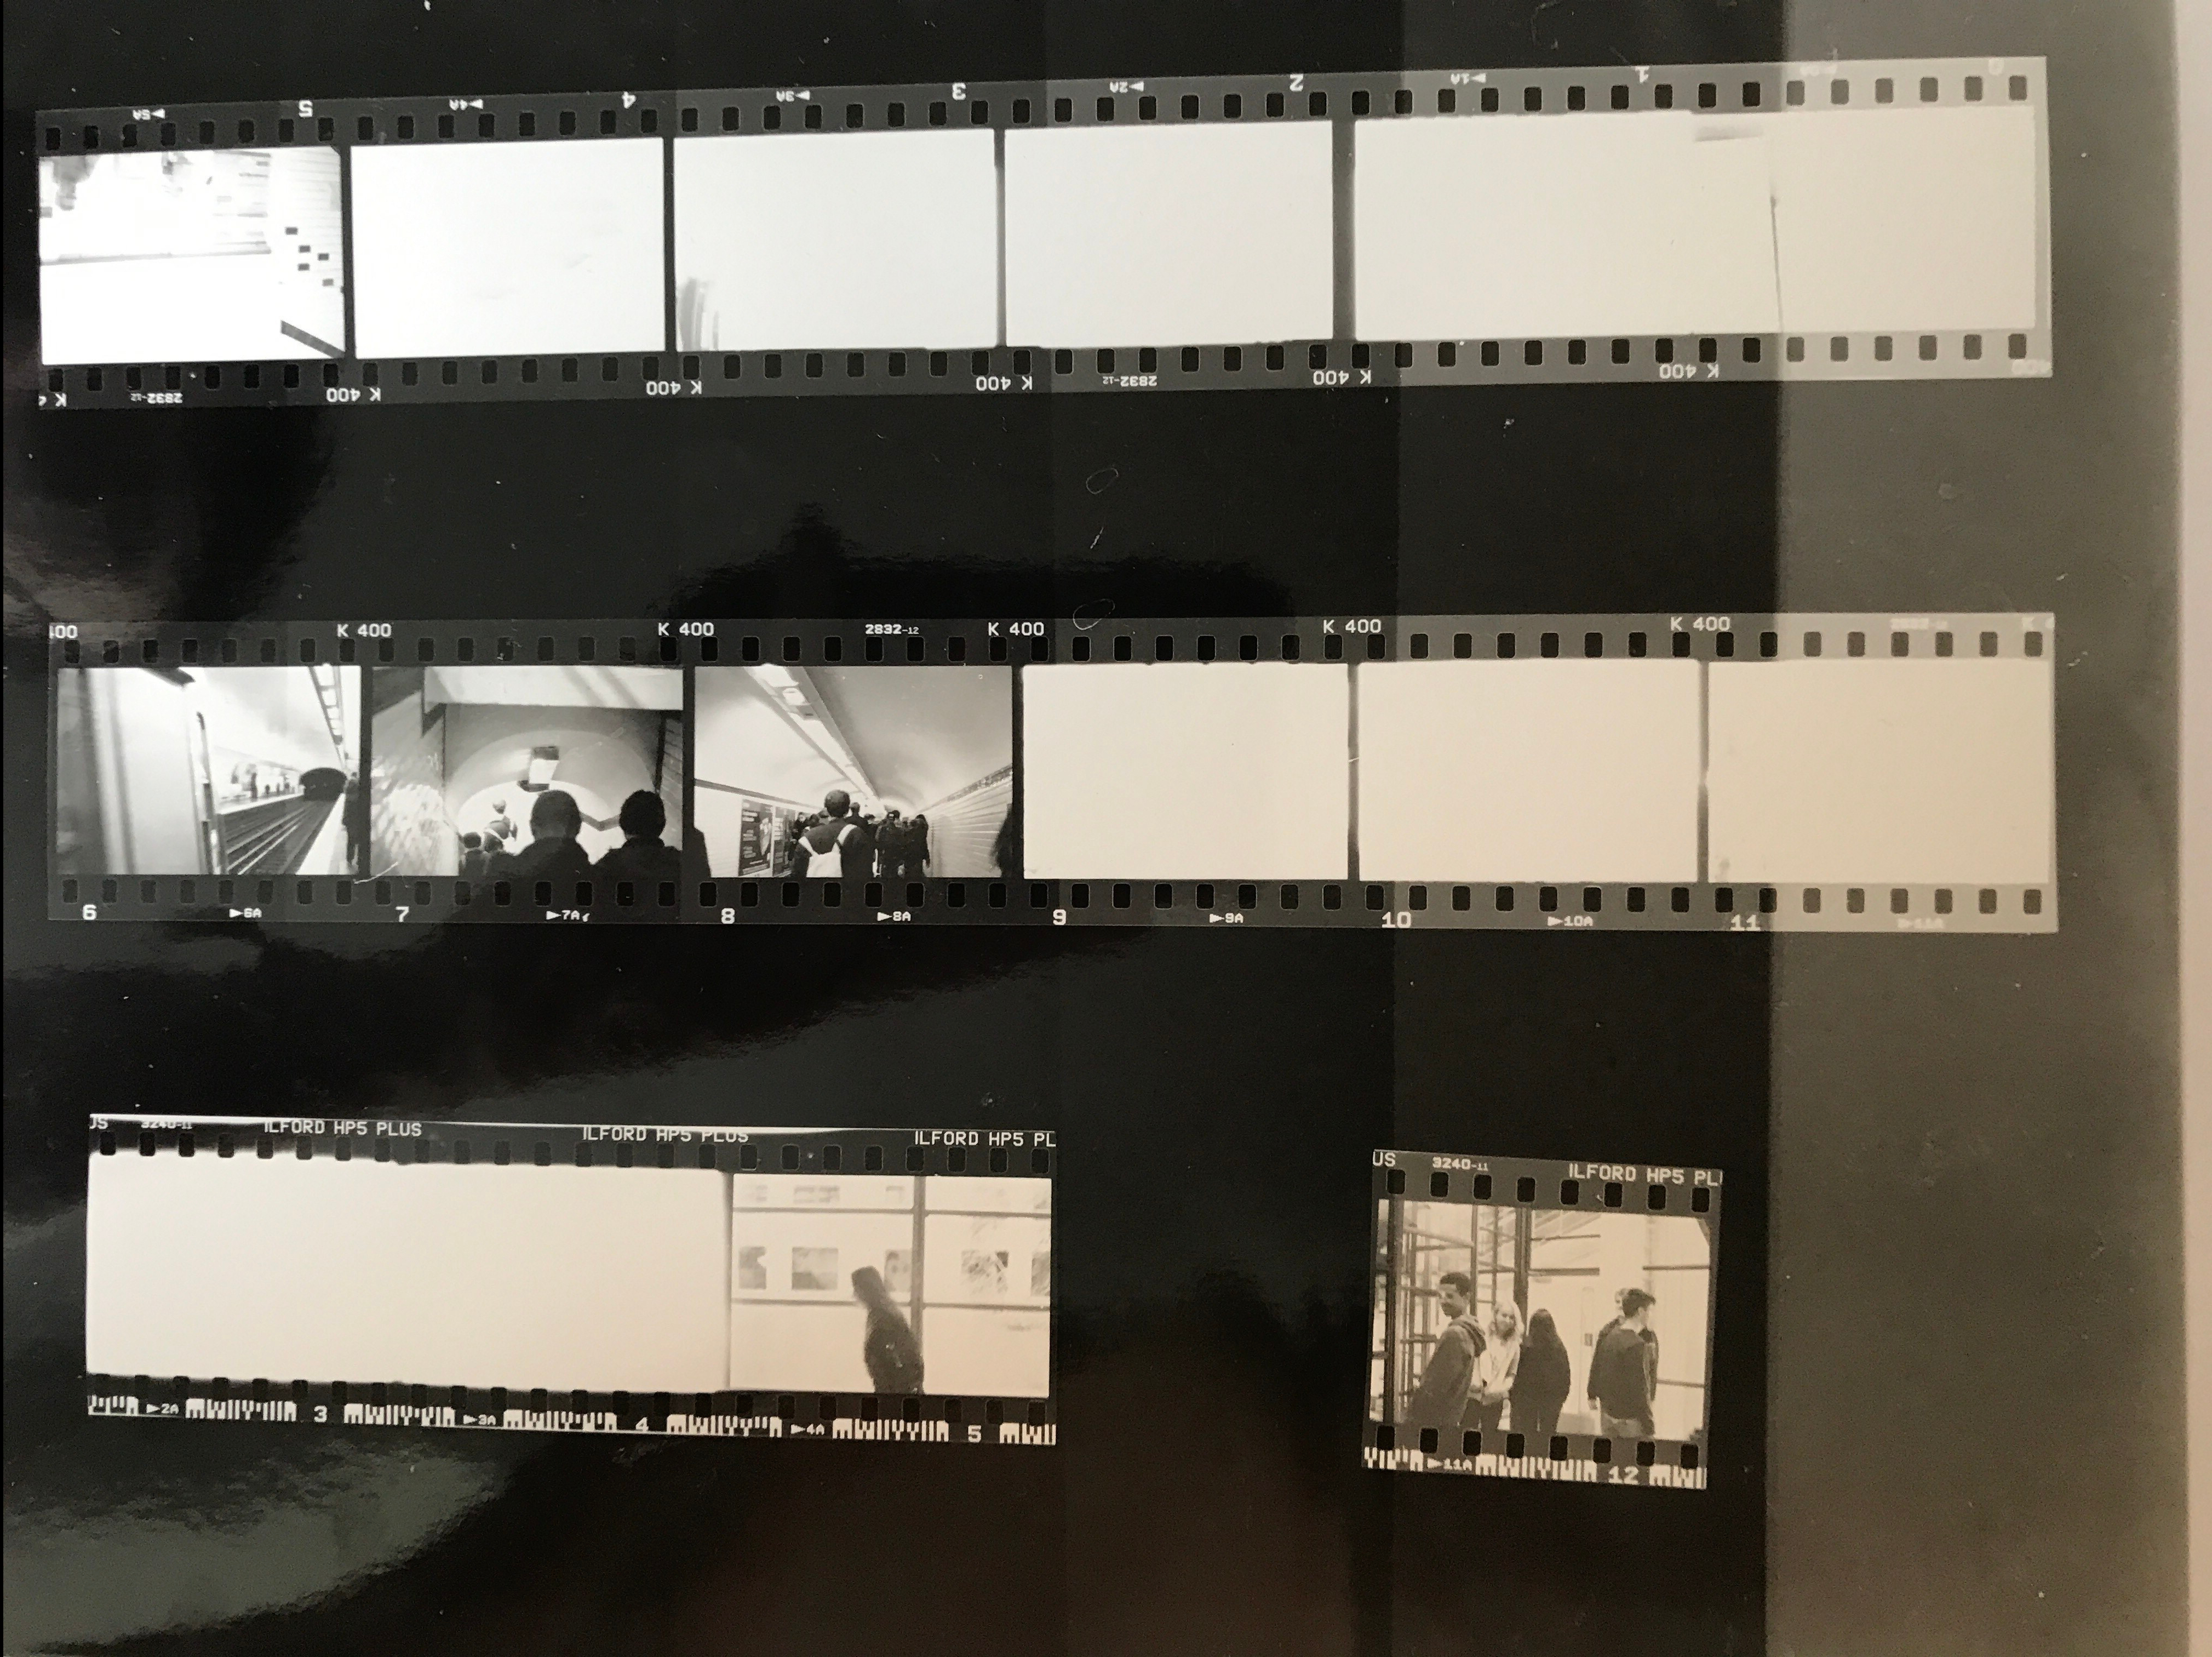 This was my first test strip and as you can see not all of them had came through, so even though i haven’t got example, i re-took these photos to get them perfect, because I wasnt happy with the way that i couldn’t see many of them because they were underexposed.

This test strip went really well and from this i found that i need to expose this for about 8 to 10 seconds. So when I went to develop this photo i would expose it for 8 or 10 seconds before putting it in the developer and rinse and fixer in the darkroom.
My film

This photo was under exposed so i re-done it to get the image to a good stage, where i was happy with it and that the image was developed well and it was clear once it came out, until i had got it to that point i would keep going until it was to that point. 
This was the final result of a image that i had chosen to re-do because the first result was not good. It was unclear and underexposed. This image above was the second result which i thought was really good and defiantly an improvement from the first one.
I thought that this image was slightly under exposed which is why I decided to do it again so i could get it to the point where it was better.
This was the final result of re-doing the image and i was very pleased with the result i had achieved after re-exposing it. I think that this is a lot clearer and developed well.
After I had done all of my prints I decided that they weren’t good after they had been developed. So I decided to concentrate on a couple of images and get them to a point where I was happy with them.
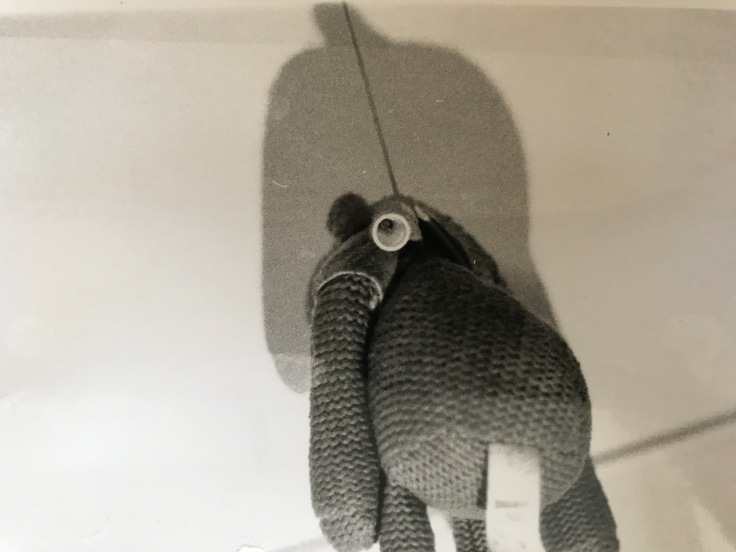
From the original photograms I had developed I decided that they hadn’t been exposed for long enough. I know that they were exposed for around 8 seconds, so I decided to do it for another 2 seconds which made that 10 seconds. Once I had done this I found that it had come out much clearer and therefore my decision to extend the timing for these two photograms was the right choice because they came out better. Also the photo with the toy monkey was a bit blurry, I re took the shot and made sure it was in focus before I shot it, so that the same problem didn’t happen again. Once I had developed it again i found that it came out exactly how I wanted it to.
If I were to do this again, I would extend the timings for all of the photos that had been under exposed because that would get them to a stage where I was happy with how they had turned out. I would have also tried to focus the camera a bit more because some of the photos that I did not re do were a bit blurry due to them being unfocused. However once I had re done the two as you can see above they were not has blurry and they were clearer.


The photos above I experimented with ink painting, with the inks I had to make sure that I didn’t have too much ink on my brush because it would make it too dark and wouldn’t cover properly; which is why I had the strip of one of my old photograms which I tested the ink before hand on that strip. Once I was comfortable with using the inks, I decided to mix them and create a sunset with the inks and I found that the results of doing this worked really well and I would defiantly do this again.

This image has finger prints on it possibly because i left greasy finger prints on the image before i developed the image which then lead for my prints to be left on it. It could have possibly have been where i had touched it before the chemicals had dried. 
This image still had water marks left on the image after it had dried, because it had been taken out of the dryer too soon which mean it left the water marks on it after being dried. 
This image was taken out of the developer too early which has given it the misty look, i should have kept better timing of this image to avoid this from happening again. So next time i do this i will keep the timings and make sure i follow the instructions step by step. 
This image was under developed, so I would have to re-do it because it was not developed to a reasonable standard. I need to make sure that im following the instructions carefully and right. 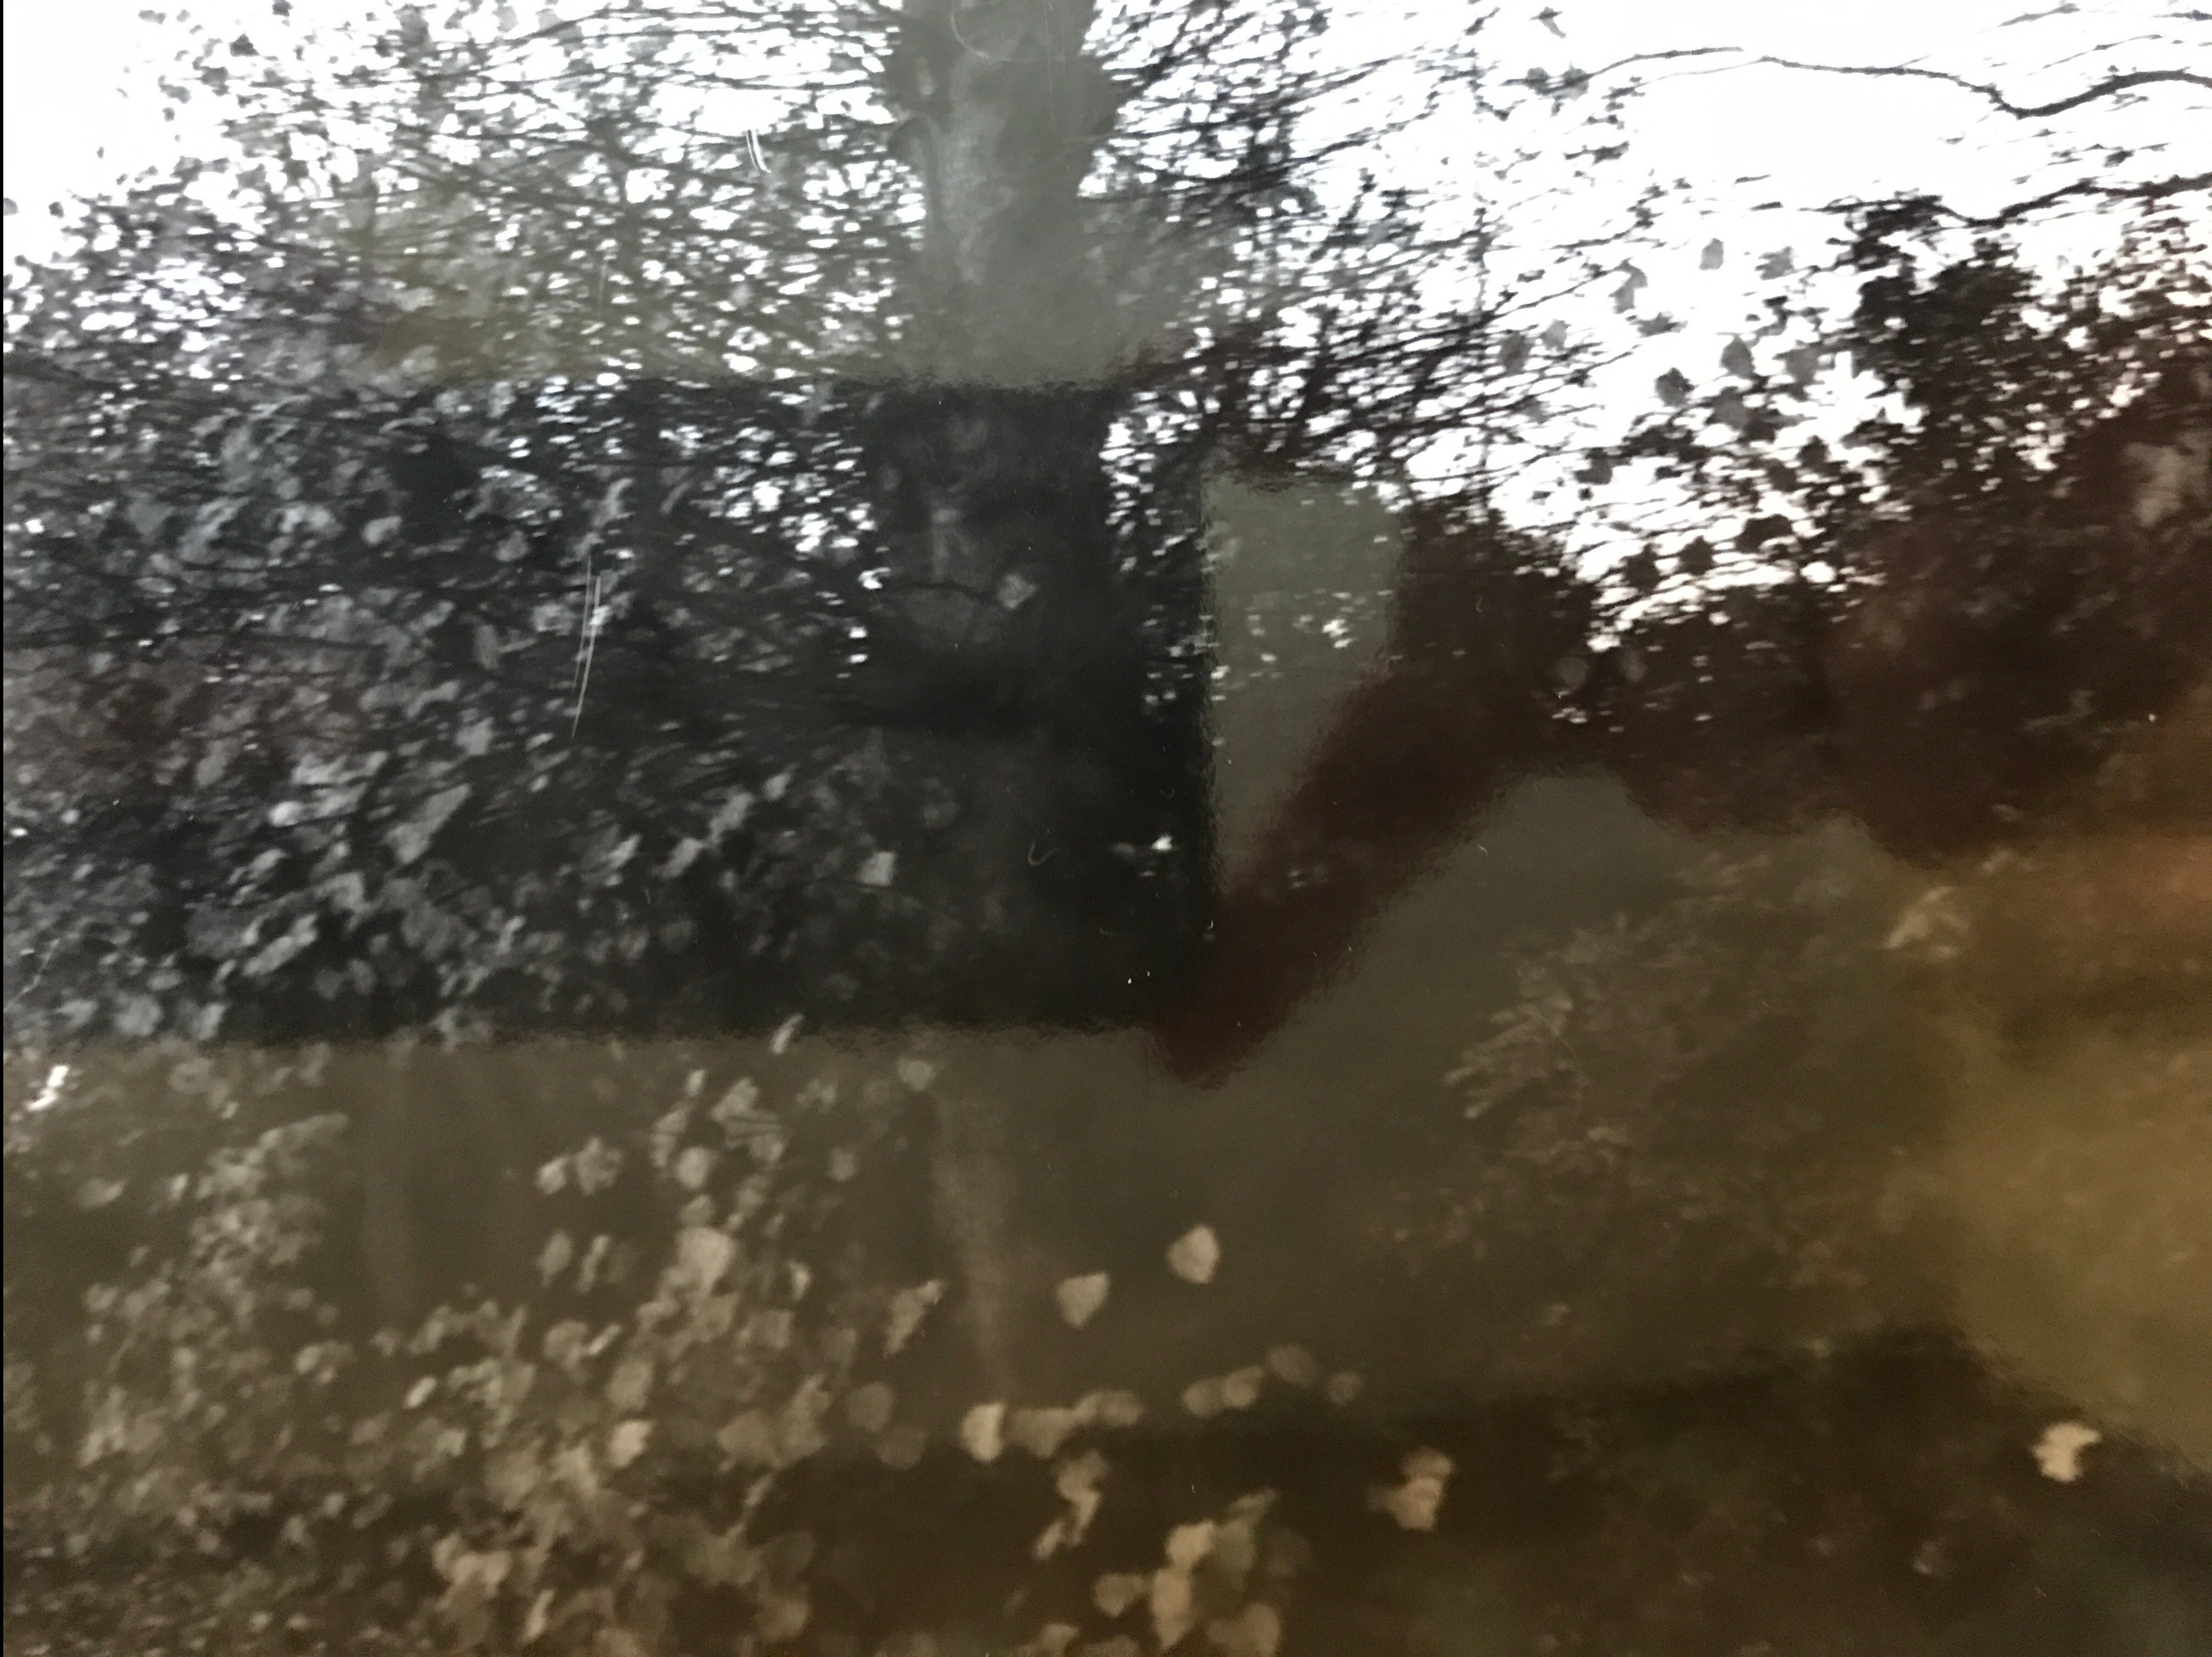
This image was actually perfectly developed and needed no improvements. I need to make sure the other images are in the same way to make them all good. 
Once again this was a pretty well developed image and didnt need any improvements. I should carry on doing it step by step, like i did with this one. 
This image was slightly too grey and maybe if i was to do this again i would expose it a bit longer to make it better. This would make the image the the best possible standard. 
This image was not even close to being developed which is like the other; why i need to concentrate on the timings more because many of my images are underexposed.
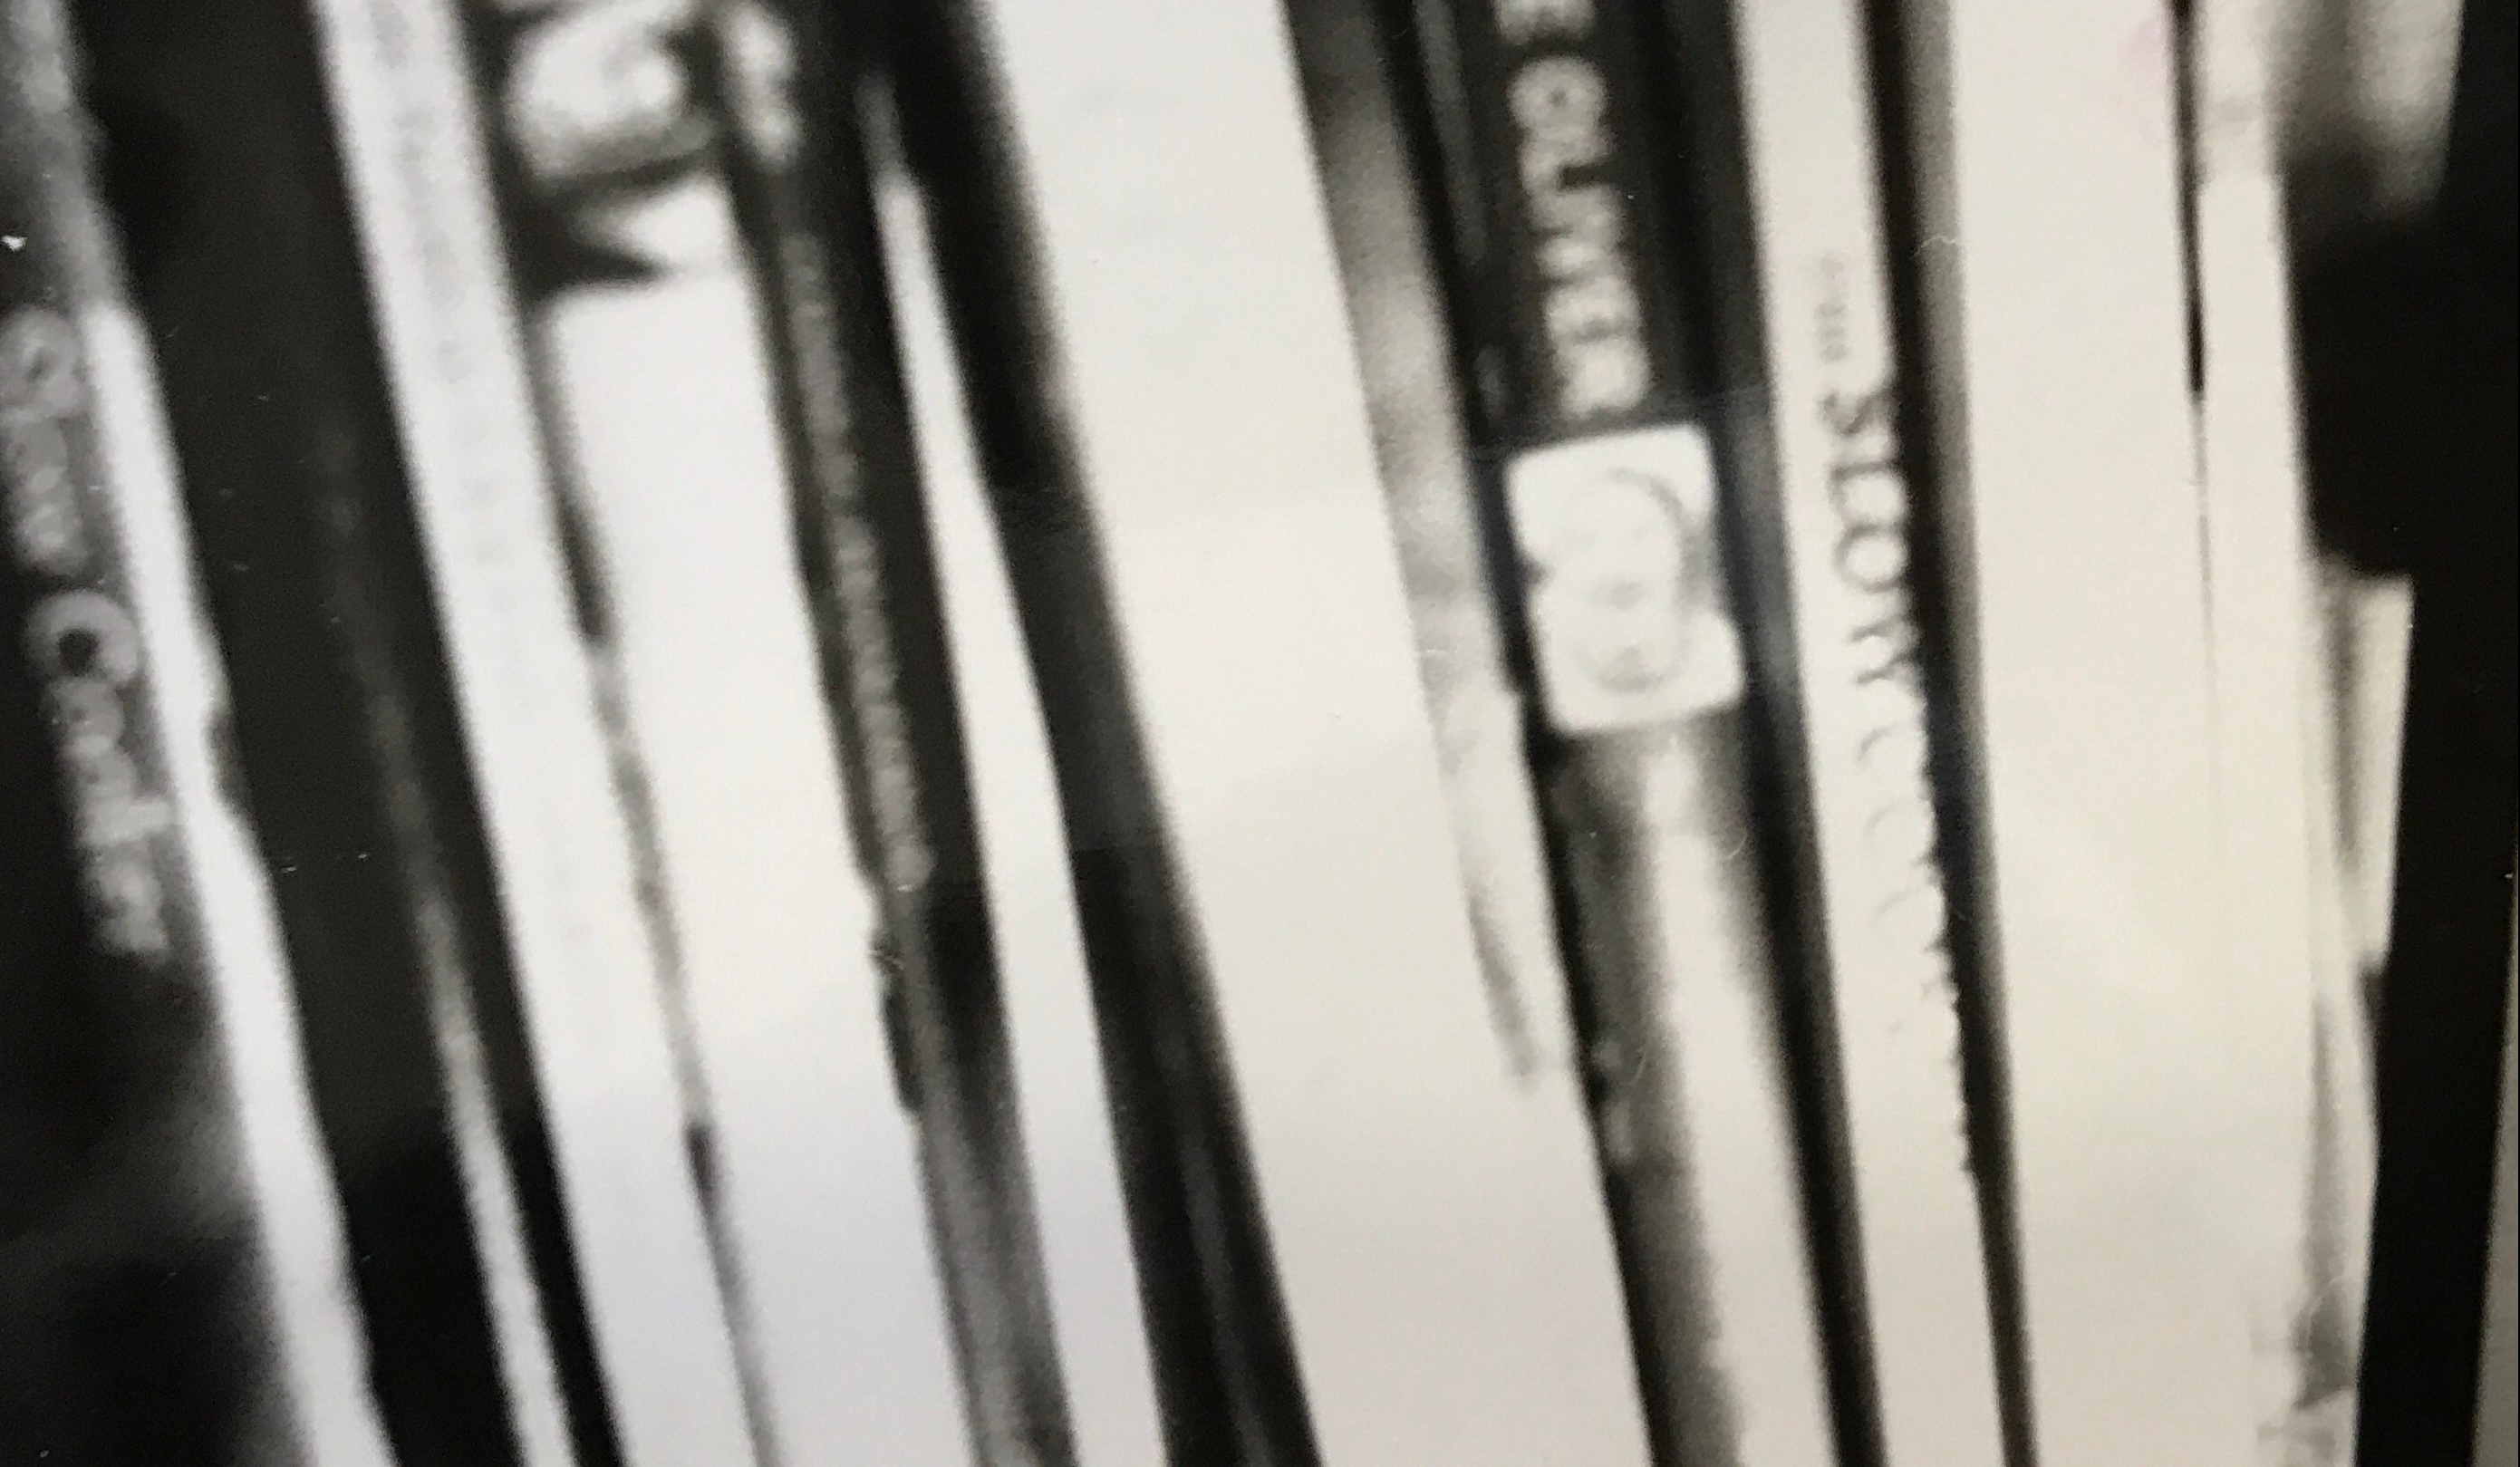
This image is under exposed because you cant read what the books say on the side, so i would expose it for longer. It also looks a bit blurry, so i would re shoot this to make it more focused and exposed to the right times. 
This image was also under exposed and needed to be developed further. I would have taken the shot again because its got a flash in the image which is covering it slightly. 


All of these photograms were either under exposed or were not in focus when I had taken the photo. So as I said before I decided that it was best for me to focus on two photos and get them to a point were I was happy with them and thought that I couldnt get them to a better outcome. I thought this was good because it meant I wouldn’t have loads to do and I perfected at least two.
Conclusion
I was happy with all of the outcomes and although not all of my photos turnt out perfectly, I had learnt from my mistakes and I improved upon them. So by going through the processes I learnt that by focusng on one or two images I can get them to a really good standard that I am happy with.
If I was to do another shoot with a film camera I would have concentrated on the focus so none of the images were blurry and i would have made sure that they were all very clear and in focus to make sure when i developed them they would be better than my last ones.
I would have also made sure that that I developed the photos step by step to get them to the best possible outcome. i would make sure that i expose the photos to the right time and make sure i do a test strip for each photo to get them to the best possible outcome also.
Overall i would make take my time with all of the process, including taking the photo because from going through my work i have found that i tend to rush things which means that my work isnt up to a good standard. I need to take my time doing all the processes carefully and thoroughly and to do each step to the correct times reading them right. This would ensure that all of my photos are to the best standard i can possibly get them too.


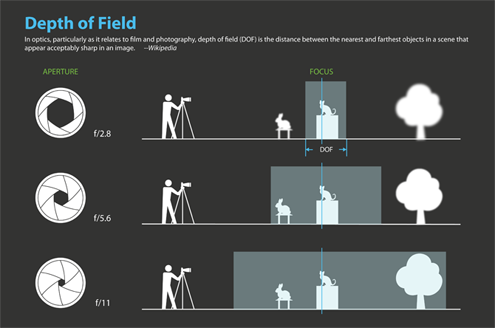
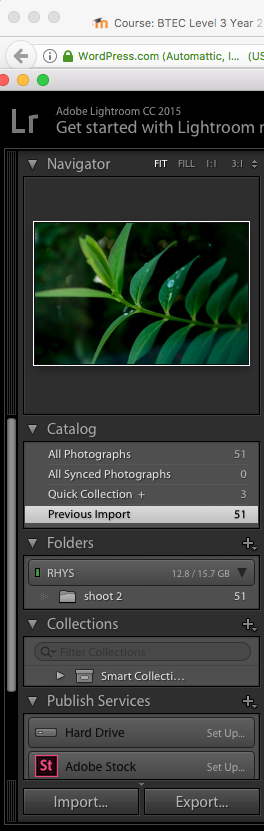
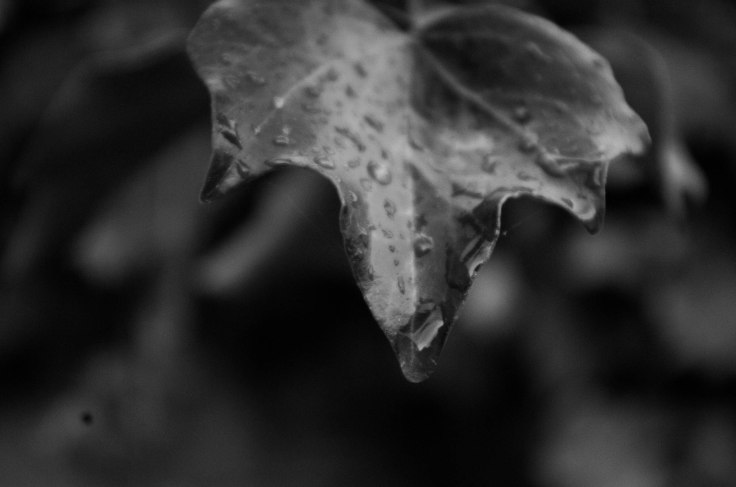 So on this image above you can see it had quite a big aperture as the leaf in the foreground is in focus but the background is blurry, this is because of the aperture. The aperture could have been anywhere from F5,6- F1,4. I would say that it was more likely F1,4 as the background is very blurry.